This article may contain affiliate / compensated links. For full information, please see our disclaimer here.
Have you ever wanted to start a travel blog but just didn’t know where to begin? In this article, I walk you through the exact steps I took to start my travel blog, which has grown from a side hustle into my full-time job.
You see, 5 years ago, my partner Tom and I started our travel blog Adventure in You and it changed our lives. Fast forward to today, and that same travel blog actively earns us a 5-figure income each month, all while we explore different corners of the globe.
Starting a travel blog gave us the freedom to pursue a life of adventure without being chained to a desk to earn a living.
If this is something that sounds appealing to you, stop what you’re doing and read this article because by the end of it, you’ll have your own travel blog up, running and ready to go!
How to Start a Travel Blog in 5 Steps
- Step #1: Decide on Your Travel Blog Niche
- Step #2: Choose a Travel Blog Name
- Step #3: Register Your Domain and Get Hosting
- Step #4: Set Up Your Blog on WordPress and Launch It
- Step #5: Start Blogging!
- Bonus: Make Money With Your Travel Blog
Follow along with the 5 steps laid out in this article and you’ll have your own travel blog up and running by the end of it!
Step #1: Decide on Your Travel Blog Niche
Before you can actually get started with your travel blog, you’ll need to decide what exactly you want to blog about. While it will definitely be something travel-related, what specifically do you want to share with your audience?
Choosing a really solid niche will help you attract your target readers to your blog and stand out from the millions of other travel blogs online.
Here are some travel blog niche examples to give you an idea of how specific you should be thinking:
- Adventure travel for younger adults (20s to 30s)
- Luxury European travel for middle-aged couples
- New Zealand campervan itineraries
- U.S. road trips for families
- Exploring Asia on a budget for young couples
As you can see, each of these niches is narrowed down to a general topic, specific place, and a target audience group. Doing this enables relevant readers to find your blog easily and get the eyes that are interested in what you have to say in front of your content.
Besides just acquiring relevant readers, niching down helps to show Google what your blog is about, as you’re writing specific content that points back to one general subject.
When this happens, your blog begins to build authority around that topic in the eyes of Google, which in turn allows your content to rank higher on search engine results, which leads to even more traffic!
For more advice on choosing a blog niche, check out this article that will help you even if you have no idea what to blog about.

Want to share this article with someone? Tweet to share below.
Step #2: Choose a Travel Blog Name
After deciding on a blog topic, the next step in starting a travel blog is deciding on a name. The name for your travel blog will quickly become your identity as your blog grows, so it’s important to choose something that can stick with you for years to come.
We named our travel blog Adventure in You because it’s specific enough to let people know what our blog is about (adventure), without putting ourselves in a box.
Take this advice as you choose a travel blog name as your own: make it specific enough so that people can tell your blog topic at a glance but broad enough that your travel blog name can grow with you.
When coming up with a name for your travel blog, start by creating a jumbo list of words related to your niche. Are there any specific keywords you’d like to target? What’s the central theme or idea behind your blog?
After brainstorming some keywords, think of adjectives that you can tack on to them. Is your travel blog exhilarating, eventful, interstellar, remote, or calm? Try to think of some words that describe the kind of travel you’re writing about.
Once you have a set of words comprised of keywords surrounding your niche and a set of words with adjectives, you can start to mix and match to find a combination of what sounds the best.
When mixing and matching to come up with a travel blog name, it helps to use literary devices like alliteration, rhyming, even puns to make your name stick out in people’s minds.
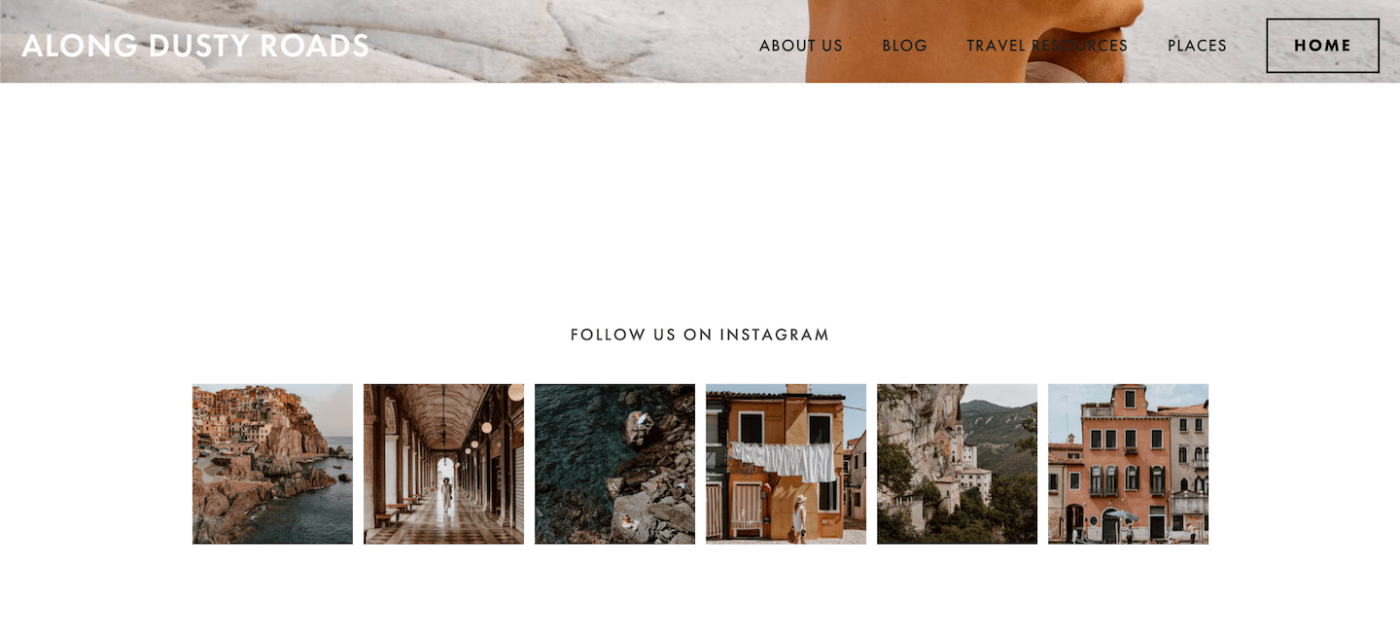
You can also seek inspiration from existing travel blog names to see what’s already working well online.
Here are some examples:
- Roads & Kingdoms
- One Mile at a Time
- Salt in Our Hair
- Along Dusty Roads
- Europe Up Close
Try to keep your travel blog name between 2 and 4 words so it’s quick and to the point.
If you already have a travel blog name in mind, make sure that it’s available using the widget below:
Disclosure: This page contains affiliate links, meaning we get a commission if you decide to make a purchase through any of the links, at no cost to you.
For some more inspiration when it comes to choosing a travel blog name, check out this article that has a whole list of existing names, as well as travel blog name ideas that you can actually use for your own blog!
I know that choosing a name for your travel blog is a big step, but don’t get too hung up on this process.
Pick something that works well for your purposes without spending days trying to find the perfect combination of words. It’s much more important to move on to the steps that will actually get your travel blog up and running rather than getting hung up over a name.
Step #3: Register Your Domain and Get Hosting
Now it’s time to set up your blog online.
During this step, you’ll be able to get a domain and hosting for your travel blog in less than 10 minutes!
But first, let’s cover some basics:
Your domain name is the actual URL of your blog. Our travel blog domain name is www.adventureinyou.com. You can purchase domains on their own for about $10 a year, but you can also get your domain when you purchase hosting (more on this in a minute!).
Hosting is what gives your blog a place to live on the internet and allows people to access your blog online. So when someone types your domain name into a search bar, hosting is what actually pulls your blog up in front of them.
To start a money-making blog, hosting is a must.
When you purchase hosting, you’re able to start a self-hosted blog. This allows you to set your blog up on a content management system, fully own your content, and do with your blog what you’d like.
It’s definitely possible to start a blog on a free platform like Wix or Blogger, which comes with its own hosting, but these platforms are riddled with restrictions, making it impossible to implement a proper monetization strategy using them.
If you want to create a business out of your travel blog (which I highly recommend you at least keep as an option), you’ll need to purchase hosting and start a self-hosted blog.
Bluehost: Our Travel Blog Hosting Recommendation
As a beginner blogger, you’ll benefit most from getting hosting through Bluehost. While there are lots of hosting providers out there, Bluehost is the most affordable hosting option for bloggers looking to get their websites live online.
When you sign up with Bluehost, you also get extra perks like a free domain name included for the first year and ultra WordPress compatibility.
Other benefits of Bluehost are:
- Affordability: Bluehost is the most affordable hosting provider for bloggers, allowing you to keep your blog online for less than the price of a cup of coffee each month.
- 24/7 Customer Service: This is a big one for us! We love the fact that Bluehost offers 24/7 chat support to help us with any tech issues that arise.
- Name Your Blog Later: If you haven’t come up with a name for your travel blog yet, Bluehost allows you to get hosting and come back with a name later.
- Free 30-Day Moneyback Guarantee: Not entirely sure? Bluehost wants to make sure that you’re happy with the product, or your money back.
We actually use Bluehost ourselves and are really happy with the experience overall. For beginner bloggers who want to get their websites going with as little hassle as possible, Bluehost is a great pick.
PS: Readers of Blogging Fast Lane can score a discount that will save you 63% on hosting. Click the button below to learn more.
Disclosure: This page contains affiliate links, meaning we get a commission if you decide to make a purchase through any of the links, at no cost to you.
Video Tutorial: Setting Up Your Blog Hosting
For visual learners, we have a complete video tutorial to walk you through how to set up hosting. Throw it on and follow along as we show you how to get your hosting quickly and easily for your travel blog.
Keep scrolling for a written step-by-step breakdown.
Step-By-Step Breakdown: Setting Up Hosting
To start the hosting process, click here to navigate to Bluehost’s homepage.
Then, click the “Get Started Now” button and you’ll be able to view the different plans offered by Bluehost.
Between the Basic, Plus, and Prime packages, beginner bloggers will be just fine with the Basic plan, especially if you’re starting a travel blog on a budget. You can also always upgrade your plan as needed so don’t be afraid to start with Basic for now.
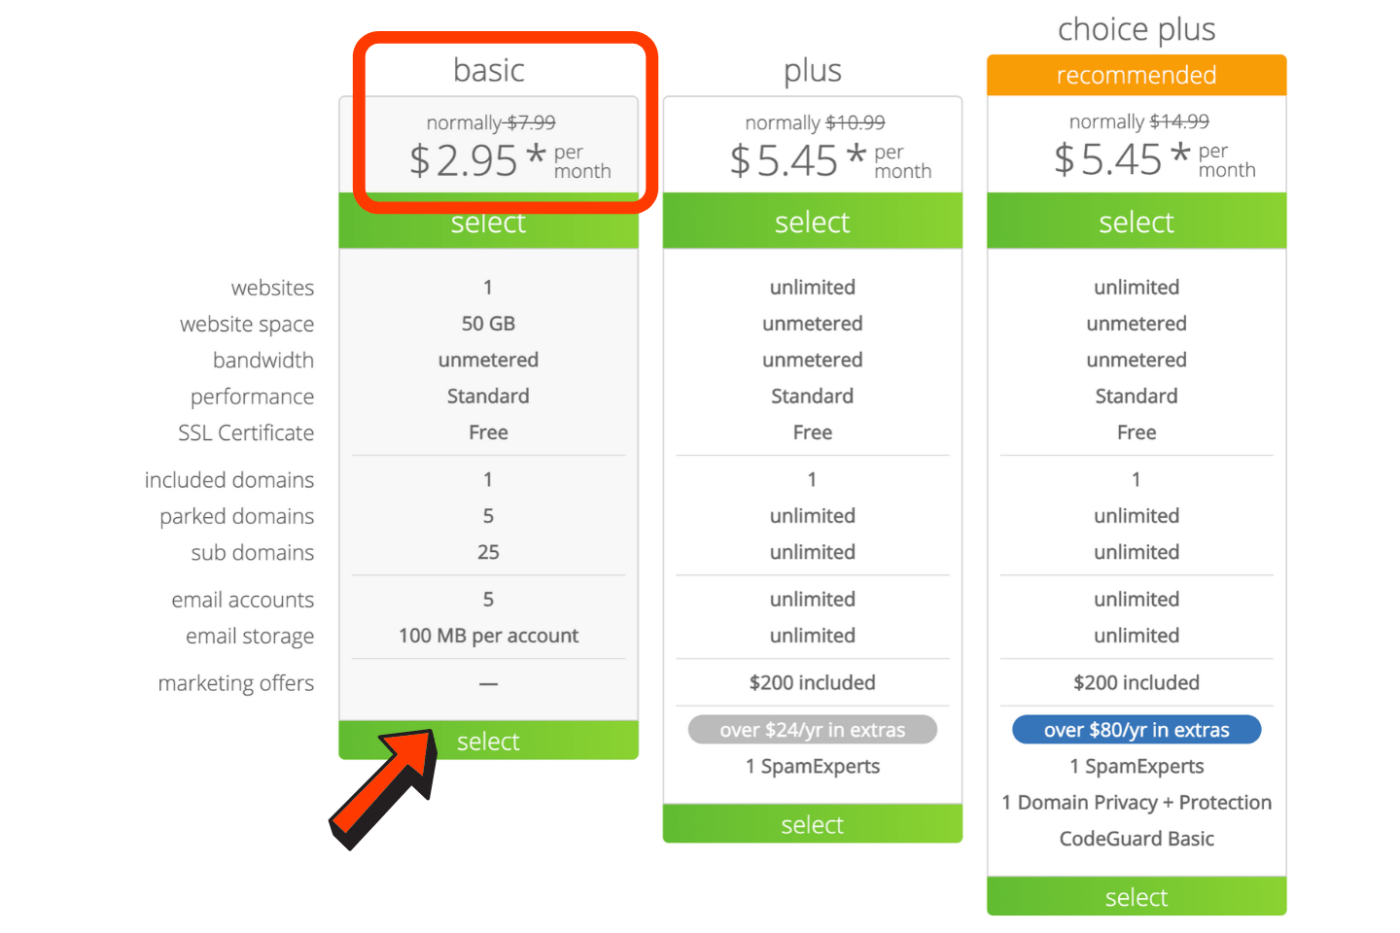
Once you choose a plan that works well for you, click “Select” and you’ll move to the next step which is registering your domain name.
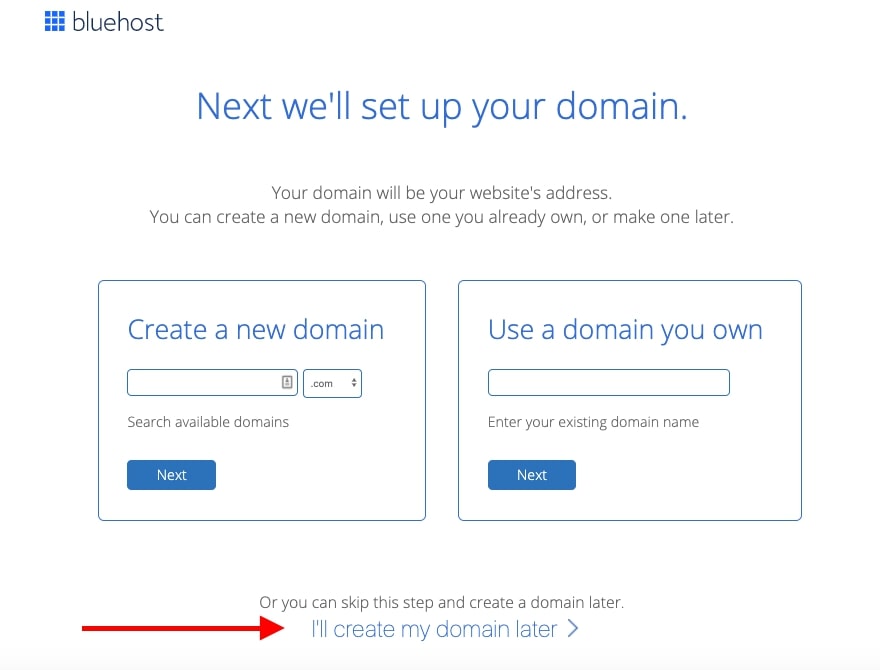
As I mentioned before, with Bluehost, there’s a domain name included for FREE for your first year! So if you already have a name in mind, go ahead and type it into the “Create a new domain” box and click “Next”.
Note: When registering your domain, I highly recommend sticking to a .com address as this has the most authority online, making it easier for your articles to rank higher.
If you haven’t settled on a domain name yet, click the “I’ll create my domain later” button at the bottom of the page and you’ll be able to proceed with the process.
After choosing a plan and getting your domain name registered, let’s finish things up by reviewing your plan and making the final purchase.
Before paying, check out the plan you’ve picked and make sure that it’ll suit your needs. You can also add on extras during this step that will give you a layer of account security and block spam.
Keep in mind that selecting the Basic plan for 36 months is the best value for beginner bloggers. With it, you’ll have the lowest monthly rate and have hosting for an entire 3 years. You can get hosting for a shorter period of time, but it will be more expensive on a monthly basis.
Once everything looks alright, submit your payment and you’ll have hosting secured!
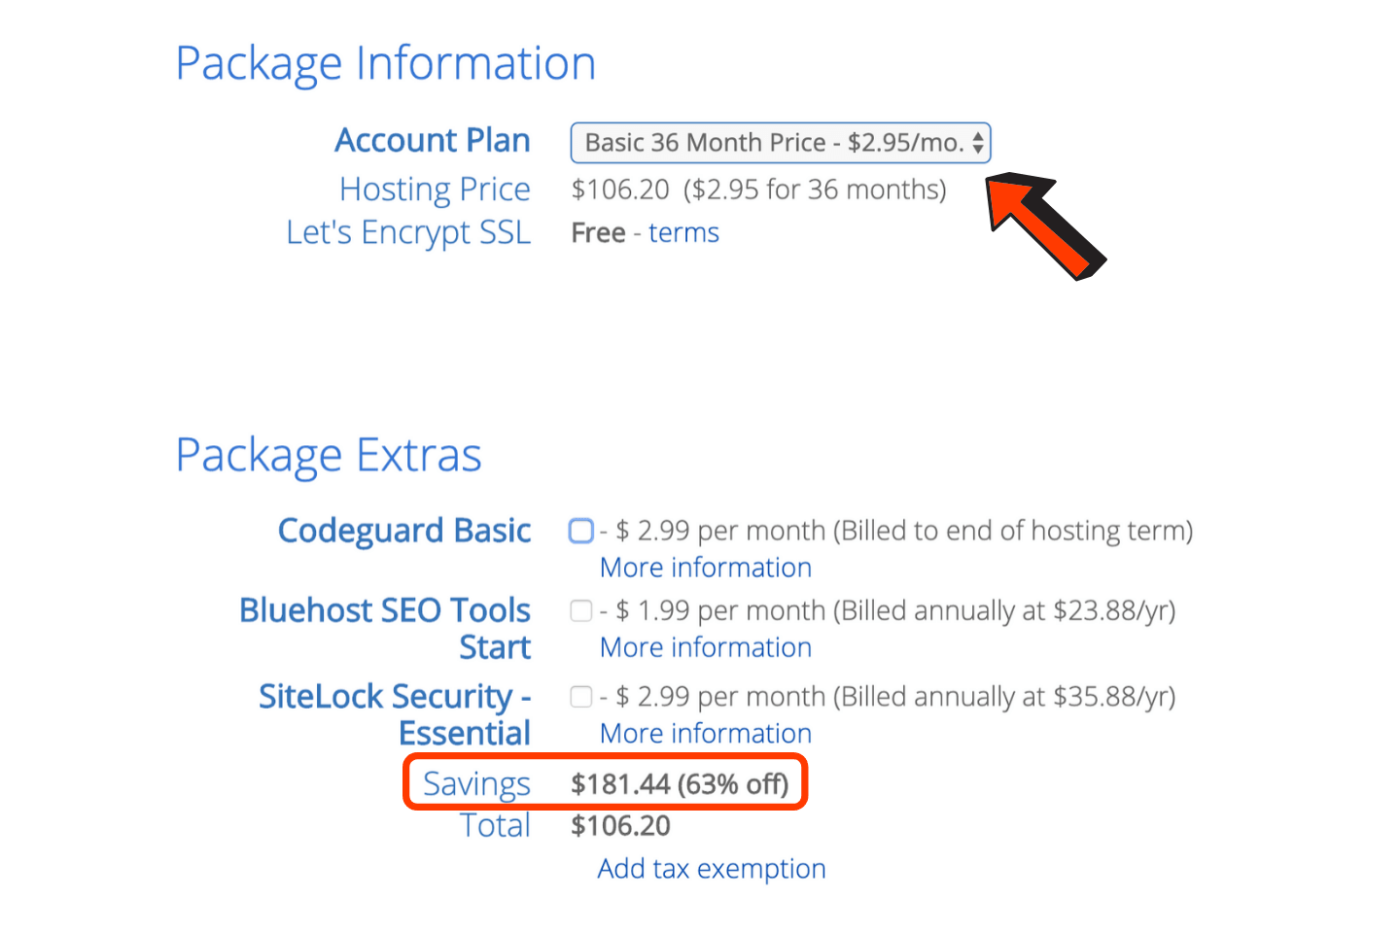
As you can see from the screenshot above, with our Blogging Fast Lane discount, you can save $181.44 on hosting! This means that hosting for your blog is just $2.95 per month… less than the price of a cup of coffee.
We actively bring in 5 figures each month with our travel blog, so considering the earning potential of the blog you’re about to start, this monthly cost is pennies.
Note: Our Bluehost discount may vary depending on Bluehost’s own promotions and what country you’re making the purchase from.
And now… you have a domain name and hosting for your blog!
Disclosure: This page contains affiliate links, meaning we get a commission if you decide to make a purchase through any of the links, at no cost to you.
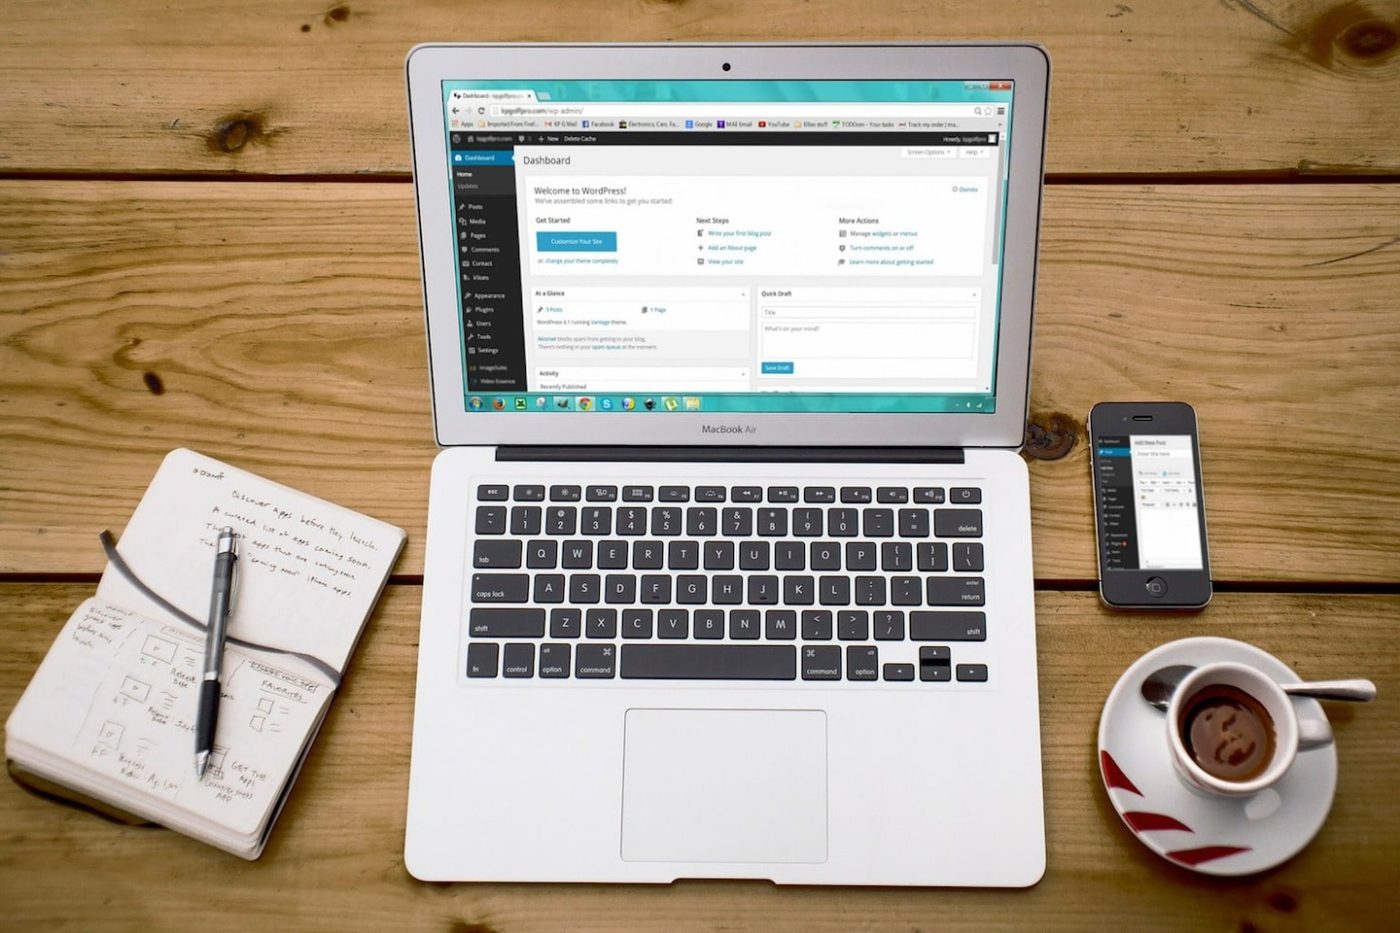
Step #4: Set Up Your Blog on WordPress and Launch It
After getting all the technical aspects of your hosting in order, it’s time to start to make it your own.
Installing WordPress
First thing’s first: a content management system (CMS).
With a self-hosted blog, you’ll need a CMS to be able to write and publish articles as well as tweak the appearance and layout of your blog.
WordPress.org is the most popular CMS for self-hosted websites and blogs, and it actually fuels the majority of the internet!
It’s free to use and pretty straightforward, making it a prime choice for anyone wishing to start a website. And since there are so many active users, if you ever run into any issues there is plenty of support and forums online to provide answers.
Note: When starting your travel blog, keep in mind the difference between WordPress.org and WordPress.com. WordPress.org is the content management system mentioned throughout this article. On the other hand, WordPress.com is a free blogging platform with its own hosting.
To turn your blog into a business, you’ll need to be working from WordPress.org.
One of the biggest perks of Bluehost is how compatible it is with WordPress. So once you secure your hosting, you can link the 2 systems up and get your blog rolling.
To do this, go to your Bluehost dashboard, navigate to the “My Sites” option on the sidebar and click “Create Site”.
From there, Bluehost will walk you through the installation process step by step and you’ll be able to use WordPress for your travel blog.
Choose a WordPress Theme
Now, let the fun begin. To get started building out your travel blog, you’ll want to pick a WordPress theme.
Themes are pre-designed website templates that can be imported directly onto WordPress and then edited with custom information. This saves so much time and effort, as well as allowing anyone to start a website as you don’t need any coding or have technical knowledge to use WordPress themes.
There are so many WordPress themes to choose from, it can be overwhelming. There are free themes and premium themes, plugins, page builders, and more.
To make matters simpler, we’ve curated a list of best travel blog WordPress themes to give bloggers a starting point.
Note: When it comes to choosing a travel blog WordPress theme, I’d suggest splurging for a premium theme right off the bat. Premium themes are much easier to work with as they have a full range of customization controls and options. On the other hand, free themes will save you some money but they can be super limited with customization and tricky to get just right.
Premium themes can cost anywhere between $10 and $80 and make it really easy to get your blog in working order.

Customize Your Blog
Once you’ve gotten a theme situated, it’s time to start customizing it to make it your own. Now’s the time to let your unique personality shine through in your travel blog and let readers know what sets your blog apart.
When you start customizing your blog, you want to make sure to build out the necessary elements first.
These are your:
- Homepage
- Post page
- About page
- Navigation menu
- Header
- Footer
From there, you can take customization a step further by adding in elements like a sidebar, search bar, or megamenu.
Once everything is in place, it’s like a game of fill-in-the-blank as you go through and insert your own information into the theme’s demo. Make sure to upload plenty of high quality photos and write a blog bio that will capture your reader’s attention.
While it can be enormously tempting to get your blog design completely and totally perfect, don’t waste your energy. Get things to a place where you can start publishing content and then go back in and tweak things to your liking down the road.
Must-Have Plugins
After getting your theme customized, you may be missing a few elements that you want to include on your blog. You can round it out by throwing some plugins into the mix.
Plugins are pre-built bits of standalone code that can be added onto WordPress to extend the functionality of a website.
Plugins can do anything from integrate social media feeds onto your website, provide extra security, create a comment thread on your posts, and so much more.
For travel bloggers, I recommend the following plugins:
- Yoast SEO: Yoast is a must-have for any blogger. This plugin gives SEO suggestions on your content, as well as allowing bloggers to edit the SEO title and Meta descriptions.
- Monster Insights: Link your Google Analytics up to WordPress with this plugin. It allows you to see metrics without leaving your WordPress dashboard!
- Google Maps: Show off your travels and create itineraries using the Google Maps plugin, which allows travel bloggers to mark their adventures and curate new ones right on their website.
- Smash Balloon Social Photo Feed: Have a gorgeously curated Instagram feed? Integrate it right onto your blog using this plugin.
- Pinterest Pin It Button: Pinterest has the ability to really boost your blog’s organic traffic tenfold. This plugin creates a little “Pin It” button for your images so that people can save them right from the page.
You’ll quickly find that there are loads of plugins out there. So many that it will make your head spin!
However, rather than downloading anything that looks appealing, only choose plugins that are relevant to your travel blog. Otherwise they just end up weighing down your site.
To get plugins on your blog, go to your WordPress dashboard, click “Plugins” on the sidebar, and hit “Add New”. This will take you to the plugin library where you can browse or search before downloading.
Once you install a plugin, make sure to hit “Activate” and it will be ready to use.
Step #5: Start Blogging!
And now it’s time to actually start blogging!
Once everything is set up and ready, it’s easy to hit the ground running. While having a beautiful blog is great, remember why you started one in the first place… to share your travel experiences and advice with others through posts and articles!
Content is truly the most important aspect of any blog, so as soon as things are set up, it’s time to get writing and publishing.
Go back to your blog niche. What sorts of articles fall within it? Can you create different categories to organize your content? These are the main things to think about when you start blogging.
More than anything, you want to make sure that every article has a clear tie back to your niche.
When writing blog posts, it really helps to work from a blog post outline so that you have a clear roadmap for your article. It also helps to rope readers in if you have a catchy headline for each blog post that will make people stop and click on your content.
Finally, to write articles that people actually care about, do your keyword research!
This is the process of looking for different keywords to see what people are actively searching for online. Once you find relevant keywords, strategically insert them into your content, which will enable your articles to rank higher on search engine page results.
Keysearch is a super affordable tool that has both yearly AND monthly plans. If you would like to try the tool, use the coupon code “FASTLANE” for a discount!
More than anything, your goal with content is to write blog posts that people will keep reading so that you can build authority online and provide value to your audience.
If you can do these two things, you’ll ultimately reach success with your travel blog.
Make Money With Your Travel Blog
So you’ve started a travel blog, gotten it set up, written tons of awesome content… now what? Well, now you can start to think about making money with your travel blog.
But how exactly do you do this?
There are lots of different ways you can monetize a travel blog… Take it from me!
Our own travel blog, Adventure in You, has lots of different income streams that contribute to a full-time income for me and my partner Tom. In fact, we make more money with our travel blog than we made with our full-time jobs as a school principal and an engineer COMBINED!
Some different methods you can think about to make money with your travel blog are:
- Affiliate marketing
- Digital products
- Physical products
- Advertising
- Online courses
- Membership site
- And more!
If you want some more tips for how to grow your travel blog into a business, check out our free online training where we walk you through this process step-by-step.

So do you think you have what it takes to start a travel blog? If you follow the steps laid out in this article, you can have your own travel blog set up in a single afternoon.
Starting a travel blog changed my life.
It took me from a life of all work and no play to one of freedom and endless possibilities. Because of our travel blog, I get to roam around the world freely, on my own terms, and earn passive income from any corner of the globe.
Besides the freedom and the money, Adventure in You has brought so many amazing people and experiences into my life that I never would have had without starting a travel blog.
The travel blog community is outrageously amazing and has given me the chance to connect with people all over the world.
It’s also what’s led us to start Blogging Fast Lane, as a way to connect with our audience on an even deeper level and share the tips and tricks we’ve learned along our blogging journey.
Our ultimate goal is to help 10,000 people profit from their passions with blogging and we would have never gotten to this place without starting our first travel blog.
If these are things that you’re seeking in your own life, starting a travel blog is the best way to turn dreams into a reality.
Like this Article? Pin it!